Eileen Mayo
Children's Book Author


Tea Party Cheshire Cat Craft
Easy print version


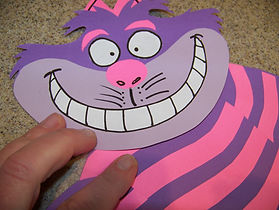
From the pages of Alice in Wonderland, this silly cat is perfect for any tea party. Metal paper fasteners let you move his arms, legs, tail, and head to do all kinds of silly things. So invite your Cheshire cat to your next tea party for loads of laughs. Have more tea party fun and make our fancy fans and tea party place mat.
What you'll need:
-
Construction paper or cardstock: Purple/lavender/pink/
-
Cheshire Cat pattern
-
Black marker
-
6 Metal paper fasteners
-
Scissors
-
Glue stick
How to make it:
-
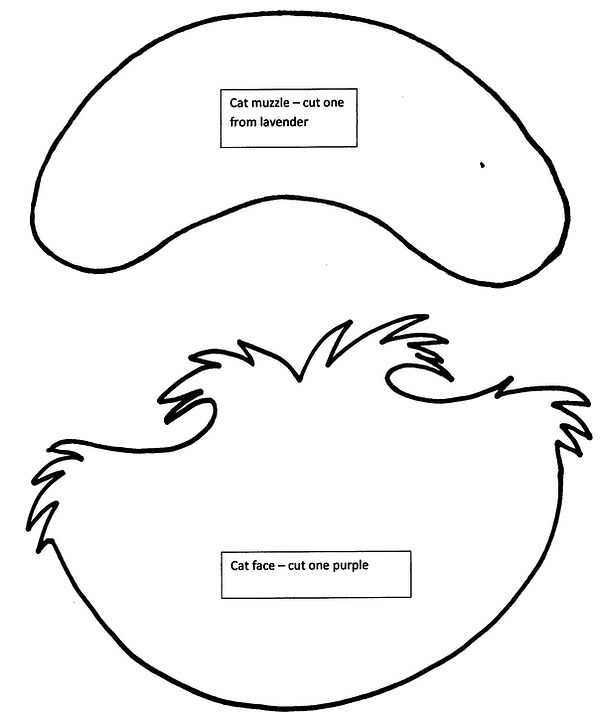
Print out the Cheshire Cat pattern and cut out the pieces from the color construction paper or cardstock indicated on the pattern. For the body, arms, legs and tail, cut an additional shape of each out of pink paper.
-
To make the stripes on the body, arms, legs and tail- take the pink duplicate shapes and cut wavy strips from the identical shape and paste it to the purple duplicate.
-
Once the pink stripes are all attached to the body parts, make holes in them where indicated in the pattern using a hole punch.
-
Attach the arms, legs and tail to the main body using metal paper fasteners. Use glue stick to attach the hands and feet to the ends of the arms and legs. Draw in the claws with black marker or, you can make them from black construction paper.
-
For the Head: Use your hole punch to make a hole in the purple head shape and attach it to the body using a metal paper fastener.
-
Attach the muzzle to the bottom of the face with glue, covering up the metal paper fastener on the head.
-
Add the smile to the muzzle and draw in two crease lines at each end of the smile.
-
Take the ears and draw a line with marker in a slight curve from the top point of each ear to the base of the ears. Glue the ears to the back of the head.
-
Cut out the eyes and glue them onto the face.
-
Attach the eyebrows above the eyes with glue stick.
-
Use marker to draw in the two nostrils on the nose and then attach the nose above the mouth at the top of the muzzle.
-
Draw a line from the bottom of the nose to the top of the mouth to define the muzzle and add couple of whiskers on either side of the line.
Your Cheshire Cat is now waiting to be posed however you like. If you would like to hang your cat, decide on the pose you want and press down firmly on each of the paper fasteners to lock in the pose. Add a looped string to the back with tape, or, just tape onto the wall window or wherever you like.